Race Timing Series: Part Three
Content
- Five Types of Chip Timing Methods
- Race Planning Considerations
- Pre-Race Considerations
- Race Day Considerations
- Mitigating Potential Problems
- Race Day Checklist
- Conclusion & Learn More
Part three of our Race Timing Series walks through information like popular tagging methods, pre-race considerations like power sources and equipment testing, and race day considerations like setting up and how to mitigate potential problems. At the end of this eBook, there is a helpful Race Day Checklist available to make sure all the preparations are complete for a race.
Five Popular Chip Timing Methods
How and where Race Timers attach the RFID tags to participants are a very important factors in Race Timing because it affects the type of tag and hardware needed to accurately time each participant. When deciding on tag placement, keep the following considerations in mind.
Five Popular Chip Tagging Methods
When tagging race participants with RFID tags, there are several different tag placements to accommodate your specific type of race. The five most popular ways to tag a racer for foot races are:
Each of these tagging methods are popular today but come with their own strengths and weaknesses. Also, not every tag or equipment setup will work with each tagging method. Below, we have outlined each type and included a short overview, pros and cons, recommended tag types and equipment setups, and ways to mitigate potential interference by the participant’s body.
To learn more about why the human body causes interference with UHF RFID, click the deep dive here - Passive vs. Active Deep Dive
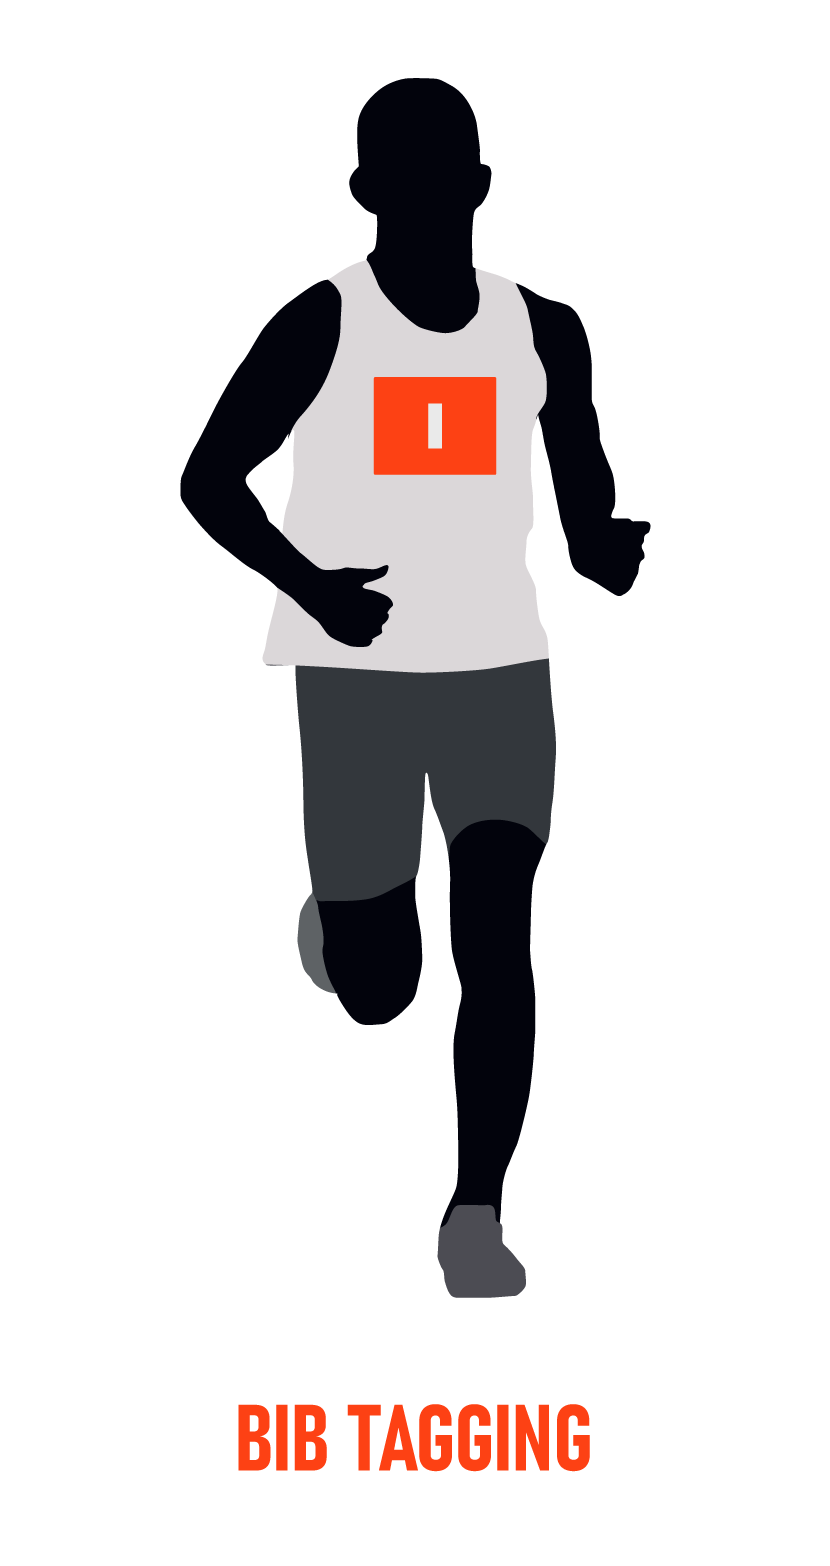
Bib Tagging
Overview
Bib tagging, as it sounds, involves tagging the participant’s running bib. The tag can be oriented horizontally or vertically depending on your antenna’s polarization.
Topic Deep Dive: Antenna Polarization
Pros
The strength of this tagging method is that you adhere the tags onto the bibs beforehand, reducing the risk of user error. Bib tagging is also generally the most cost-effective and popular method for timing foot races.
Cons
Read range may be limited due to close proximity to the human body. Another negative to this method is that some runners decide not to wear a shirt that the bib can pin to, so they will place their bib in other locations, which can be hard to read. Bibs also could fall off due to a runner’s movements or rugged terrain.
Recommended RFID Tag Types
In bib tagging, it is most common to use disposable RFID Wet Inlays because they easily adhere to the bib and can be placed anywhere on the bib and oriented horizontally or vertically depending on RFID antenna setup.
Recommended RFID System Setup
Panel antennas can be arranged on both sides of the track at a median height of the bib and angled inward towards the checkpoint. Using this setup, you could potentially use either circularly or linearly polarized antennas. Circularly polarized panel antennas are recommended because of the participants’ height differences, and they compensate in the event that a participant’s bib becomes uneven. Linearly polarized panel antennas work best when the beam is aligned with a known tag orientation.
Alternatively, you can setup using multiple circularly polarized antennas across the top and sides of a truss. In such a setup, you can place two antennas at the top angled downward and two on the sides (at average bib height) angled inward.
Mat antennas underneath the racer will also work well with the bib tagging method. Placing the tag vertically on the bib typically gets the best read rates when using mat antennas if the mat antennas are linearly polarized. In any setup, you should thoroughly test exact antenna placement and read angles to ensure you achieve ideal read rates. A combination of mat and panel antennas is recommended for large races in order to cover all angles.
Interference Mitigation
Due to the close proximity to the human body, read range and rates could be much lower than expected. In order to mitigate the interference, it’s important to create separation between the tag and the racer with a foam spacer. Most timers use foam spacers, either that come pre-attached to the wet inlays, or they place the foam spacer on themselves.
Double Bib Tagging
Overview
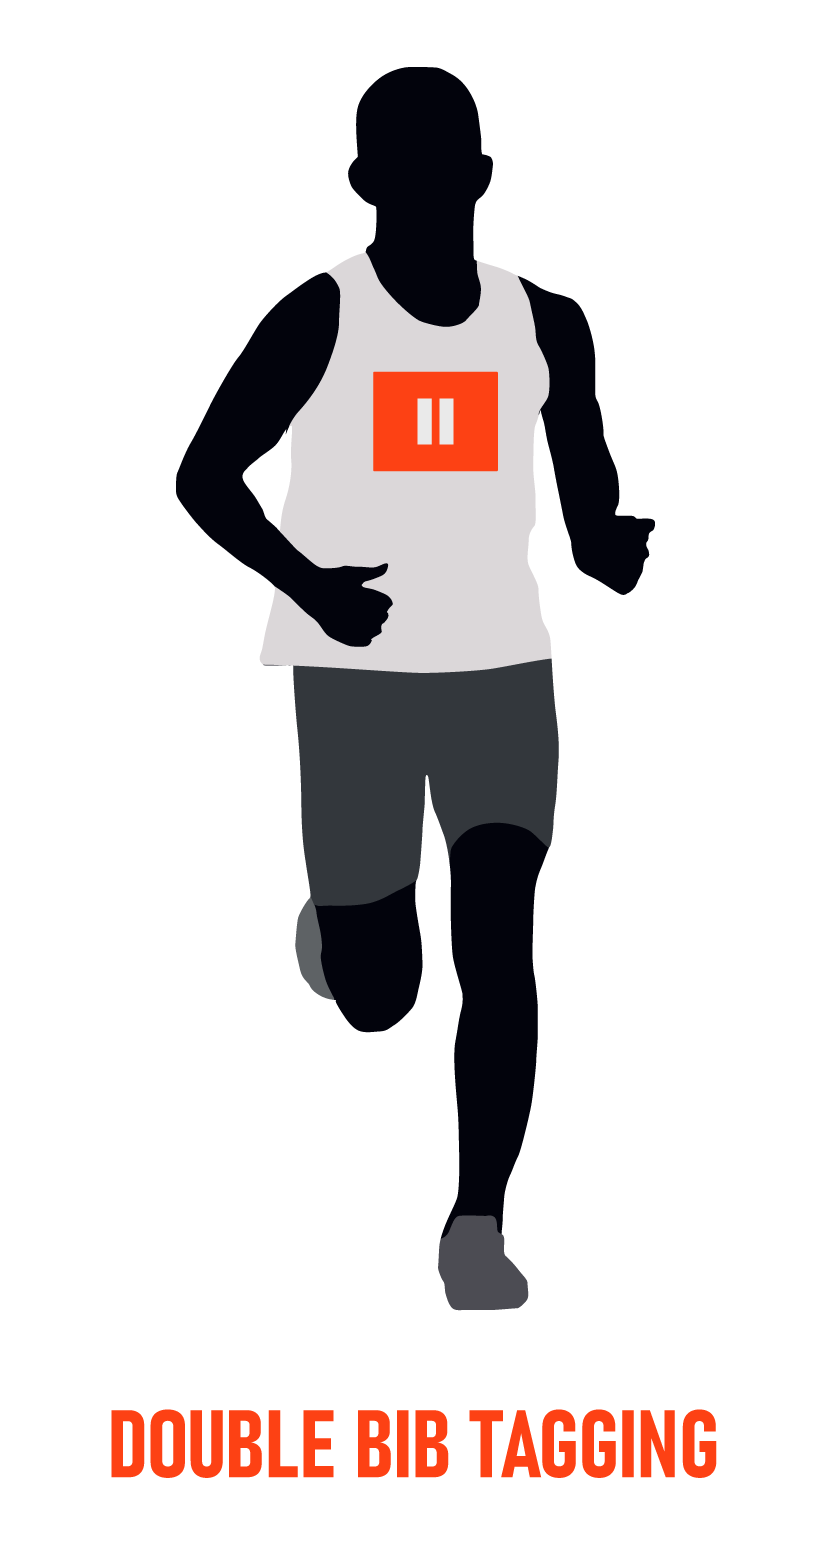
Double Bib tagging is when the race timer affixes two tags to the runner’s bib in two different orientations or two in the same orientation. Both RFID tags are encoded with the same ID number as their EPC number, so the read is captured no matter if only one of the tags is captured, or both.
Pros
There are two tags, increasing the chance of receiving a read. Most pros from Bib Tagging carryover.
Cons
Two main issues exist with this type of tagging. This method is double the cost because you’re using two tags per racer. The read range also may be diminished because of how close the tags are to the human body. Most cons from Bib Tagging carryover.
Recommended RFID Tag Types
Similar to regular bib tagging, double bib tagging is commonly accomplished with UHF Wet Inlays adhered to the participant’s bib. Pay attention to height, orientation, and angle when placing each tag on the bib. Each RFID tag should be separated by at least a few inches on all sides from the other RFID tags. These tags should never touch or overlap.
Recommended RFID System Setup
RFID Panel antennas can be arranged on both sides of the track at a median height of the bib and angled inward towards the checkpoint. Using this setup, you could potentially use either circularly or linearly polarized antennas. Circularly polarized panel antennas are recommended because of the participants’ height differences and compensate in the event that a participant’s bib becomes uneven. Linearly polarized panel antennas work best when the beam is aligned with a known tag orientation.
Topic Deep Dive: Tag Orientation
Alternatively, you can setup using multiple circularly polarized antennas across the top and sides of a truss. In such a setup, you can place two antennas at the top angled downward and two on the sides (at average bib height) angled inward.
Mat antennas underneath the racer will also work well with the bib tagging method. Placing the tags vertically on the bib typically gets the best read rates when using mat antennas if the mat antennas are linearly polarized. In any setup, you should thoroughly test exact antenna placement and read angles to ensure you achieve ideal read rates.
Interference Mitigation
Read range and rates may be diminished from each tag’s close proximity to the human body. If this is true, place a foam spacer between the RFID tag and the participant’s bib to create more space.

Shoe Tagging
Overview
Shoe Tagging Shoe tagging is placing a tag on the runner’s shoe and is typically used in races with a smaller number of participants. Tags that attach to shoes typically have a hole punched in a corner for attachment and these tags can either be pinned on the side of the shoe, or slid on a shoelace before a runner’s shoes are tied.
Pros
This tagging method acts as an alternative method if bibs are not used or preferred. Tagging on a relatively small part of the human body may increase the chance of reading the RFID tag (due to less interference). These tags are also reusable, which saves money, and because most runner’s shoes will be in the same area at the finish line, shoe tagging allows for a more concentrated read zone.
Cons
One downside of this tagging method is that the orientation is completely unknown because the tag will bounce with the runner. This limits the race timer to primarily using circularly polarized panel antennas. Also, due to the nature of the tag and antenna setup, this tagging method is not recommended for races with a large number of participants. Runner’s shoes are also moving through the read zone at a faster speed than the runner’s torso which might mean the read zone should be lengthened to account for the increased speed.
Recommended RFID Tag Types
Shoe tagging is usually accomplished by using reusable dry inlays, or reusable custom shoe-lace tags, but reusable hard tags are generally too heavy to attach via a shoelace.
Recommended RFID System Setup
Shoe tagging works best when used with circularly polarized panel antennas. Place at least two circularly polarized panel antennas on each side of every read point (more if the race has a larger number of participants). Be sure to have the antennas around a foot off the group and facing inward at a 90-degree angle to the racer as he or she passes by the read point.
Interference Mitigation
Because the RFID tag is not adhered to the shoe, and instead can bounce, there will not be much interference from the human body with this tagging method.
Hip Tagging
Overview
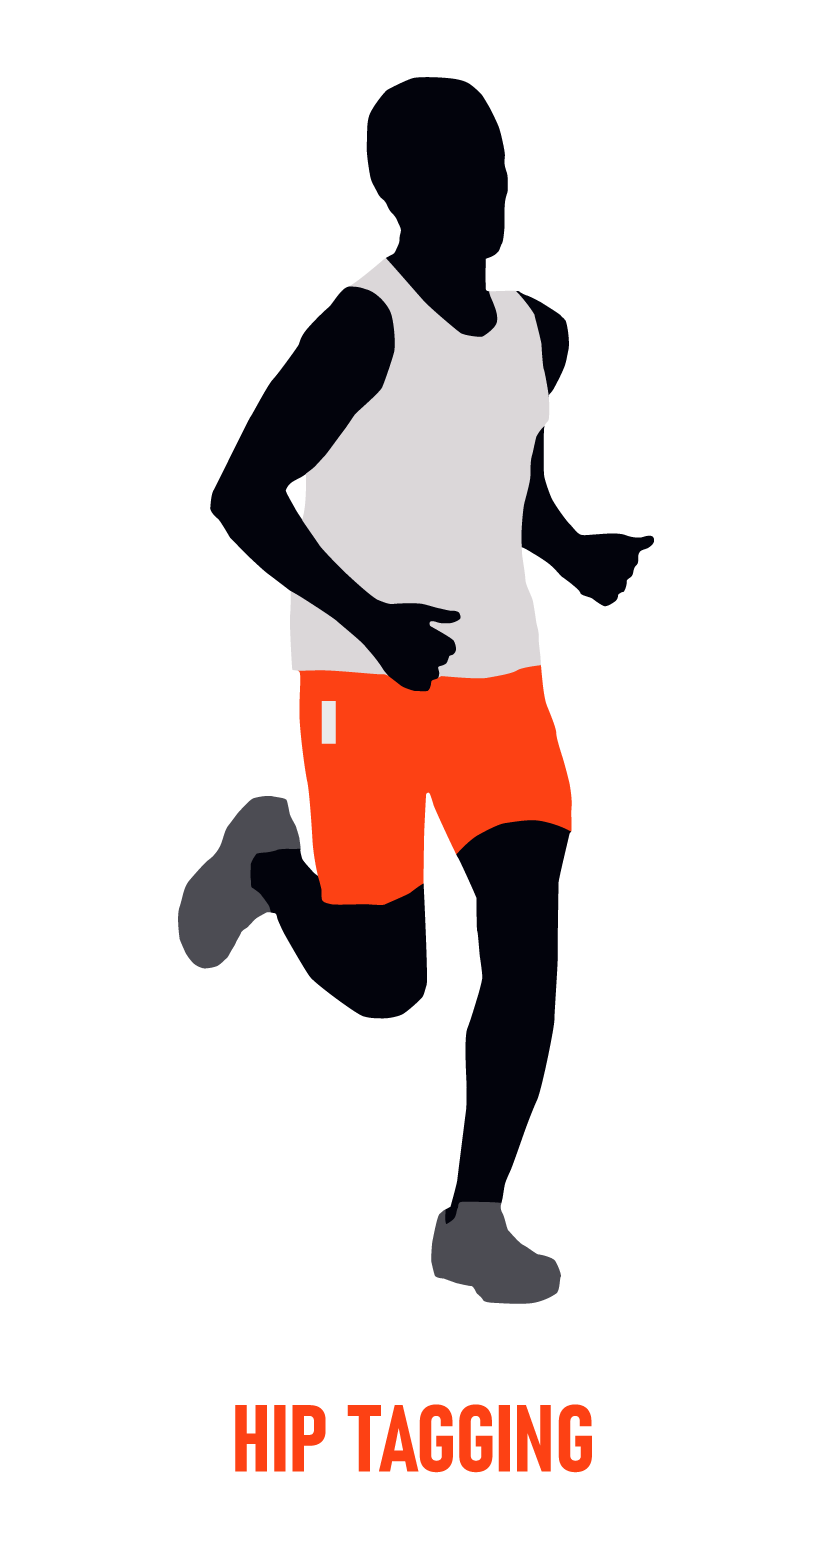
Hip tagging, used mainly for smaller races, places a tag on each of the runner’s hips. This way, antennas on both sides of the read zone will pickup the tags
Pros
Two tags are utilized, increasing the chances of obtaining a read as the racer passes by the read point.
Cons
Double the tags, double the cost with this method. Another downside is that the tag is at one of the thickest parts of the human body, thus possibly reducing the read range.
Recommended RFID Tag Types
Hip tagging is commonly accomplished by using reusable/disposable dry inlays or reusable custom card-like tags, but reusable hard tags are generally too heavy to be placed on the participant’s hips.
Recommended System Setups
Because the tag is secured to the hip, panel antennas should be used with this tagging method. Circularly or Linearly polarized panel antennas aimed at the average hip height usually produce better reads for this tagging style. The antennas should be facing inward at a 90-degree angle to the racer as he or she passes by the read point.
Interference Mitigation
A participant’s hips are the widest part of the human body, so there is typically heavy interference in that region along with the chest. In order to mitigate that interference, tags are commonly only attached at the top via a clip or safety pin. Because the tags are only attached at the top, they are free to bounce or swing with a participant’s movement, which allows for more space between the RFID tag and the human body.
Ankle/Wrist Tagging
Overview
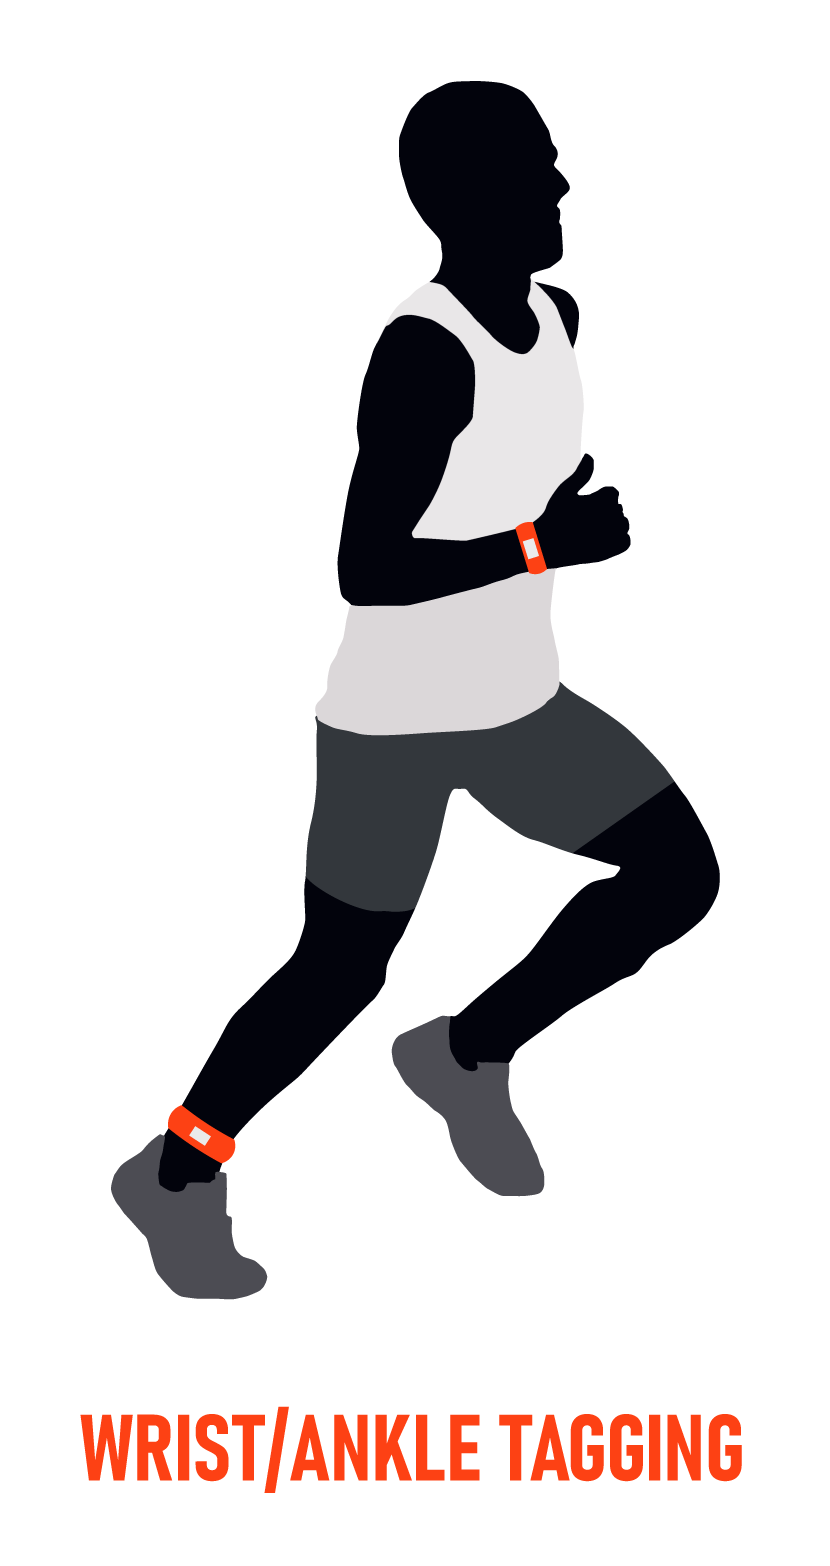
Ankle and wrist tagging are typically only used in races that include water like triathlons, swimming races, or events that take place in the rain or mud. This tagging method usually relies on Velcro or snap-attach straps to attach reusable, hard RFID tags to participants’ ankles and wrists.
Pros
These tags usually have a long read range and read accuracy because they are placed on smaller sections of the human body and created specifically for event timing. These tags are typically reusable which makes them a fixed cost instead of a variable cost.
Cons
These reusable hard tags are much more expensive than any other type of event timing tag. Because these tags are reusable, racers have to return them after the race and sometimes racers forget and timers have to purchase replacements, which can be expensive.
Recommended RFID Tag Types
Ankle and wrist tagging require reusable hard tags or reusable wristband tags.
Recommended System Setups
Because the tag is secured to the hip, panel antennas should be used with this tagging method. Circularly or Linearly polarized panel antennas aimed at the average hip height usually produce better reads for this tagging style. The antennas should be facing inward at a 90-degree angle to the racer as he or she passes by the read point.
Interference Mitigation
A participant’s hips are the widest part of the human body, so there is typically heavy interference in that region along with the chest. In order to mitigate that interference, tags are commonly only attached at the top via a clip or safety pin. Because the tags are only attached at the top, they are free to bounce or swing with a participant’s movement which allows for more space between the RFID tag and the human body.
Tagging For Other Races
For races that incorporate a bike, kayak, or ATV, the tag typically dictates where it will be placed in order to be read. For more information on races like this, contact our Race Timing specialist.
Race Planning Considerations
Whether you are planning your first race or your hundredth, this guide gives you the ins and outs of preparing for a race – from many weeks beforehand and all the way till race day. Every event starts with the planning process, but before you begin, be sure to collect all the details surrounding the race – the who, what, when, where, and why.
Planning Stage
Understand how many splits and read zones your race will need before determining the required equipment. Other important questions include:
- What information does the race director require?
- How many checkpoints will your race have?
- What RFID equipment will you need?
- Number of participants?
- Location of the race?
Number of Read Zones and Amount of Equipment
Every race is different, so gather as much information as you can before you begin planning such as how many read zones or checkpoints will my race have.
- One finish line (gun start, no RFID equipment at start line)
- How many checkpoints will your race have?
- One start line and one finish line OR
- One start line, one finish line, 1/4 split, 1/2 split, and 3/4 split
Think about the estimated traffic at each read zone so that you can prepare proper coverage. The earlier in the race, the higher concentration of traffic in a general area and as the race goes on, participants will typically spread out. If there is a read zone at the start of the race, or toward the beginning, that read zone might need more RFID hardware to be covered than the finish line, or a read zone further on in the race.
Location of the Race
The location and route of the race is important to know ahead of time so you can plan your equipment setup accordingly. If you know the race is on a remote hiking trail, you can plan the read zones according to the trail width as well as power outlets available. When you scope out the location, be sure to ask the race director if he or she will be providing a power outlet or power source for your equipment. Once you know the answer, you can come prepared with a generator, power strip, or extensions cables ready to go on race day. Some races may be overseas or across state lines making it important to plan how to transport your equipment to the location on race day. Flying or driving your equipment to the location before the race might save you time and hassle on race day.
What Information Does the Race Director Require?
When you start the planning process, learn what information the race director wants to see from the results. For example, you may need to include split times, MPH per racer, winning time per group, racer information, etc.
Number of Participants
To begin planning for your race, one of the first steps is knowing the approximate number of participants. Not all participants sign up before race day, but setting a maximum number of participants allows you to plan your RFID equipment setup confidently. If you haven’t reached that maximum number by race day, bring extra bibs and tags so that newcomers can sign up at the race.
How to Select RFID Equipment
RFID readers, antennas, tags, bibs, cables, software and accessories are some of the things you will need to get started. There are multiple options for your RFID system, so selecting your equipment might not be black and white. The equipment you’ll use depends on the factors above like number of read zones, checkpoints, number of participants, race director information, length of the race, and more.
One way to determine the equipment is to look specifically at the number of participants and the length of the race. If it is a short race, with 500+ participants, the finish line may be extremely crowded. Crowded read points are something to avoid because participants could run into equipment, and there is a greater chance of missing a participant’s RFID tag. Waiting time and missed reads will produce unhappy racers. If you do have a short race with many of participants, try to stagger the start times and release runners in groups. Longer races have a higher chance for the participants to scatter out, and they usually run through the finish line in a line or small groups making the tags easier to read and the amount of RFID equipment needed per read zone generally less.
For most finish lines, it is recommended that you “bottle neck” the finish line and have a shoot that is only around 5-6 ft. wide. This allows you to have a dense concentration of RF energy in a small area – ensuring that you pick up the tag. Bottle necks can be disguised by adding banners and celebratory items to allow the racers to experience a big final moment.
For more information regarding which equipment is right for your race, please refer to Part 2 of this RFID Race Timing Series.
Planning Conclusion
Completing the Planning Stage typically means:
- I know the number of maximum participants (i.e. number of bibs & tags)
- I have scoped out the location and have an outline of my race day setup.
- I know exactly what the race director needs from me as the race timer.
- I have purchased RFID equipment, accessories, and bibs.
- I know the number of read zones required.
- I have selected RFID equipment.
Pre-Race Considerations
When you have completed the planning stage, you are ready to move on to Pre-Race information and setup. In the Pre-Race section, we will cover the following information:
- How do I register participants for my race?
- How do I affix the tag on the participant?
- How do I encode UHF RFID tags?
- How do I setup my equipment?
- When do I test?
How Do I Register Participants for My Race?
There are a few different options you and your race director can provide participants for registration purposes. Mail-in registration, an internet site or landing page, a local store willing to hand out and receive registration forms, and a booth setup on race day are some common ways to handle registration. Some race timers prefer one channel of registration, while others experiment with many to entice more participants. When you start producing registration forms remember that there are some key pieces of information you need to obtain like name, contact information, gender, phone number, age, or other data that could help to segment participants if your race has group starts or result grouping.
How Do I Mount My Equipment?
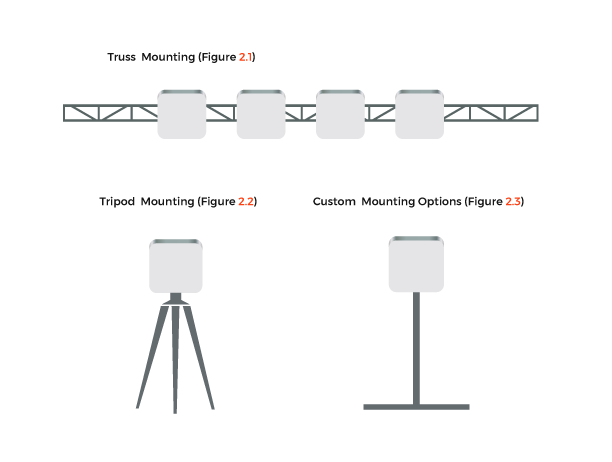
Panel antennas will need to be mounted in order to obtain the best coverage. There are several mounting options from which to choose, truss mounting, tripod mounting, or even designing your own mounting option. Remember that your mounting decision should be based upon which tag you’ve chosen as well as where the tag is located on the participant. As an example, if you decide to tag your participants with a shoe tag, you would not get good reads from a truss mounting system since the truss would be above the participants head. Later in this chapter, we will talk more about how to tag your participants. Below are some real race examples of mounting options.
How Do I Encode Tags, And What Am I Encoding On Them?
In order to get your tags ready for race day, you have to first understand a little bit about the memory banks on a UHF RFID Tag. For more information on each memory bank, be sure to read our article Types of Memory in RFID tags. The primary memory banks that are used for race timing are the EPC memory bank and the TID memory bank.
Topic Deep Dive: Types of Memory
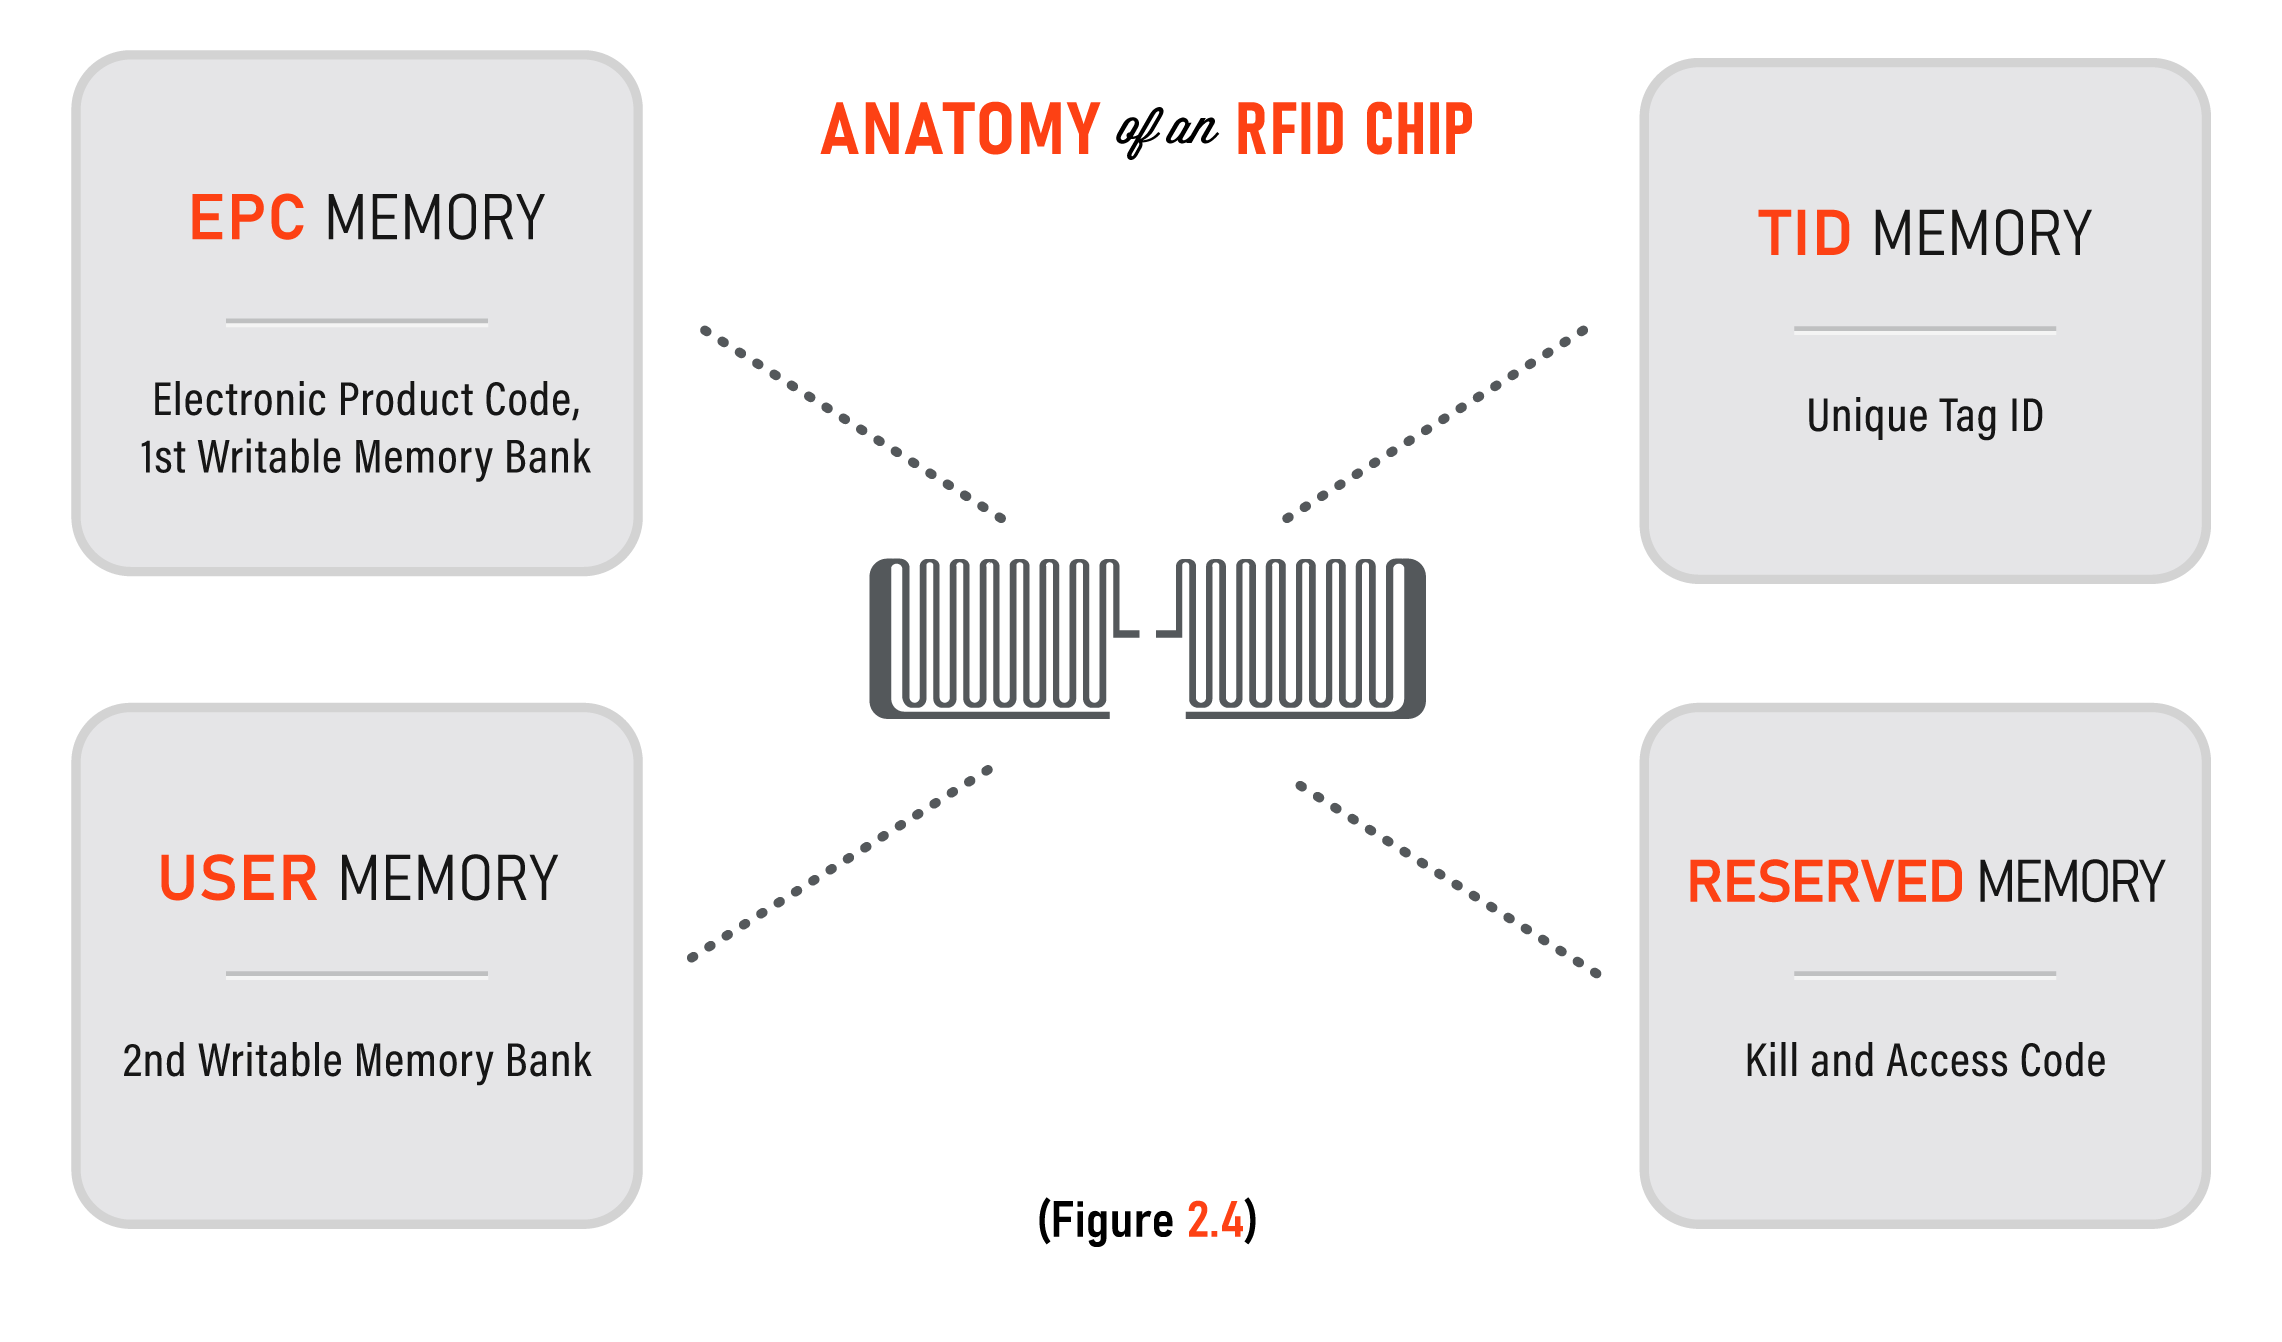
The EPC memory bank is optimal because it is the first memory block that responds when a tag is interrogated - giving you the quickest interaction with a tag. EPC memory banks contain a minimum of 96 bits of writable memory which is 24 hexadecimal characters or 12 ASCII characters. If your tag’s EPC memory has more than 96 bits, simply divide the bits of memory by four to produce the number of hexadecimal characters and divide by eight to get the number of ASCII characters the memory bank can hold.
The most common way to use the EPC memory bank is to overwrite the pre-encoded number with the bib number. If you use this method, your software only needs to know one number per participant, making the system less complicated.
With Higgs tags from Alien Technology, you have the option to use the pre-programmed, randomized number on the EPC memory bank and associate it with the bib number in your software. If you use Impinj Monza 4D or Monza 5 chips, you cannot rely on this method because all the preprogrammed EPC numbers are the same on those tags.
The TID memory bank is another option for race timing. The TID memory bank on all tags contains a random, non-repeating number that you can associate in your software with a participant’s bib number. All readers come preset to read the EPC memory bank which means if you want to read the TID memory bank, you will have to change the read settings on each reader. This method is not frequently used because receiving the TID number from a tag can take longer than receiving the EPC number, and milliseconds can add up.
Affixing the RFID Tag To The Participant
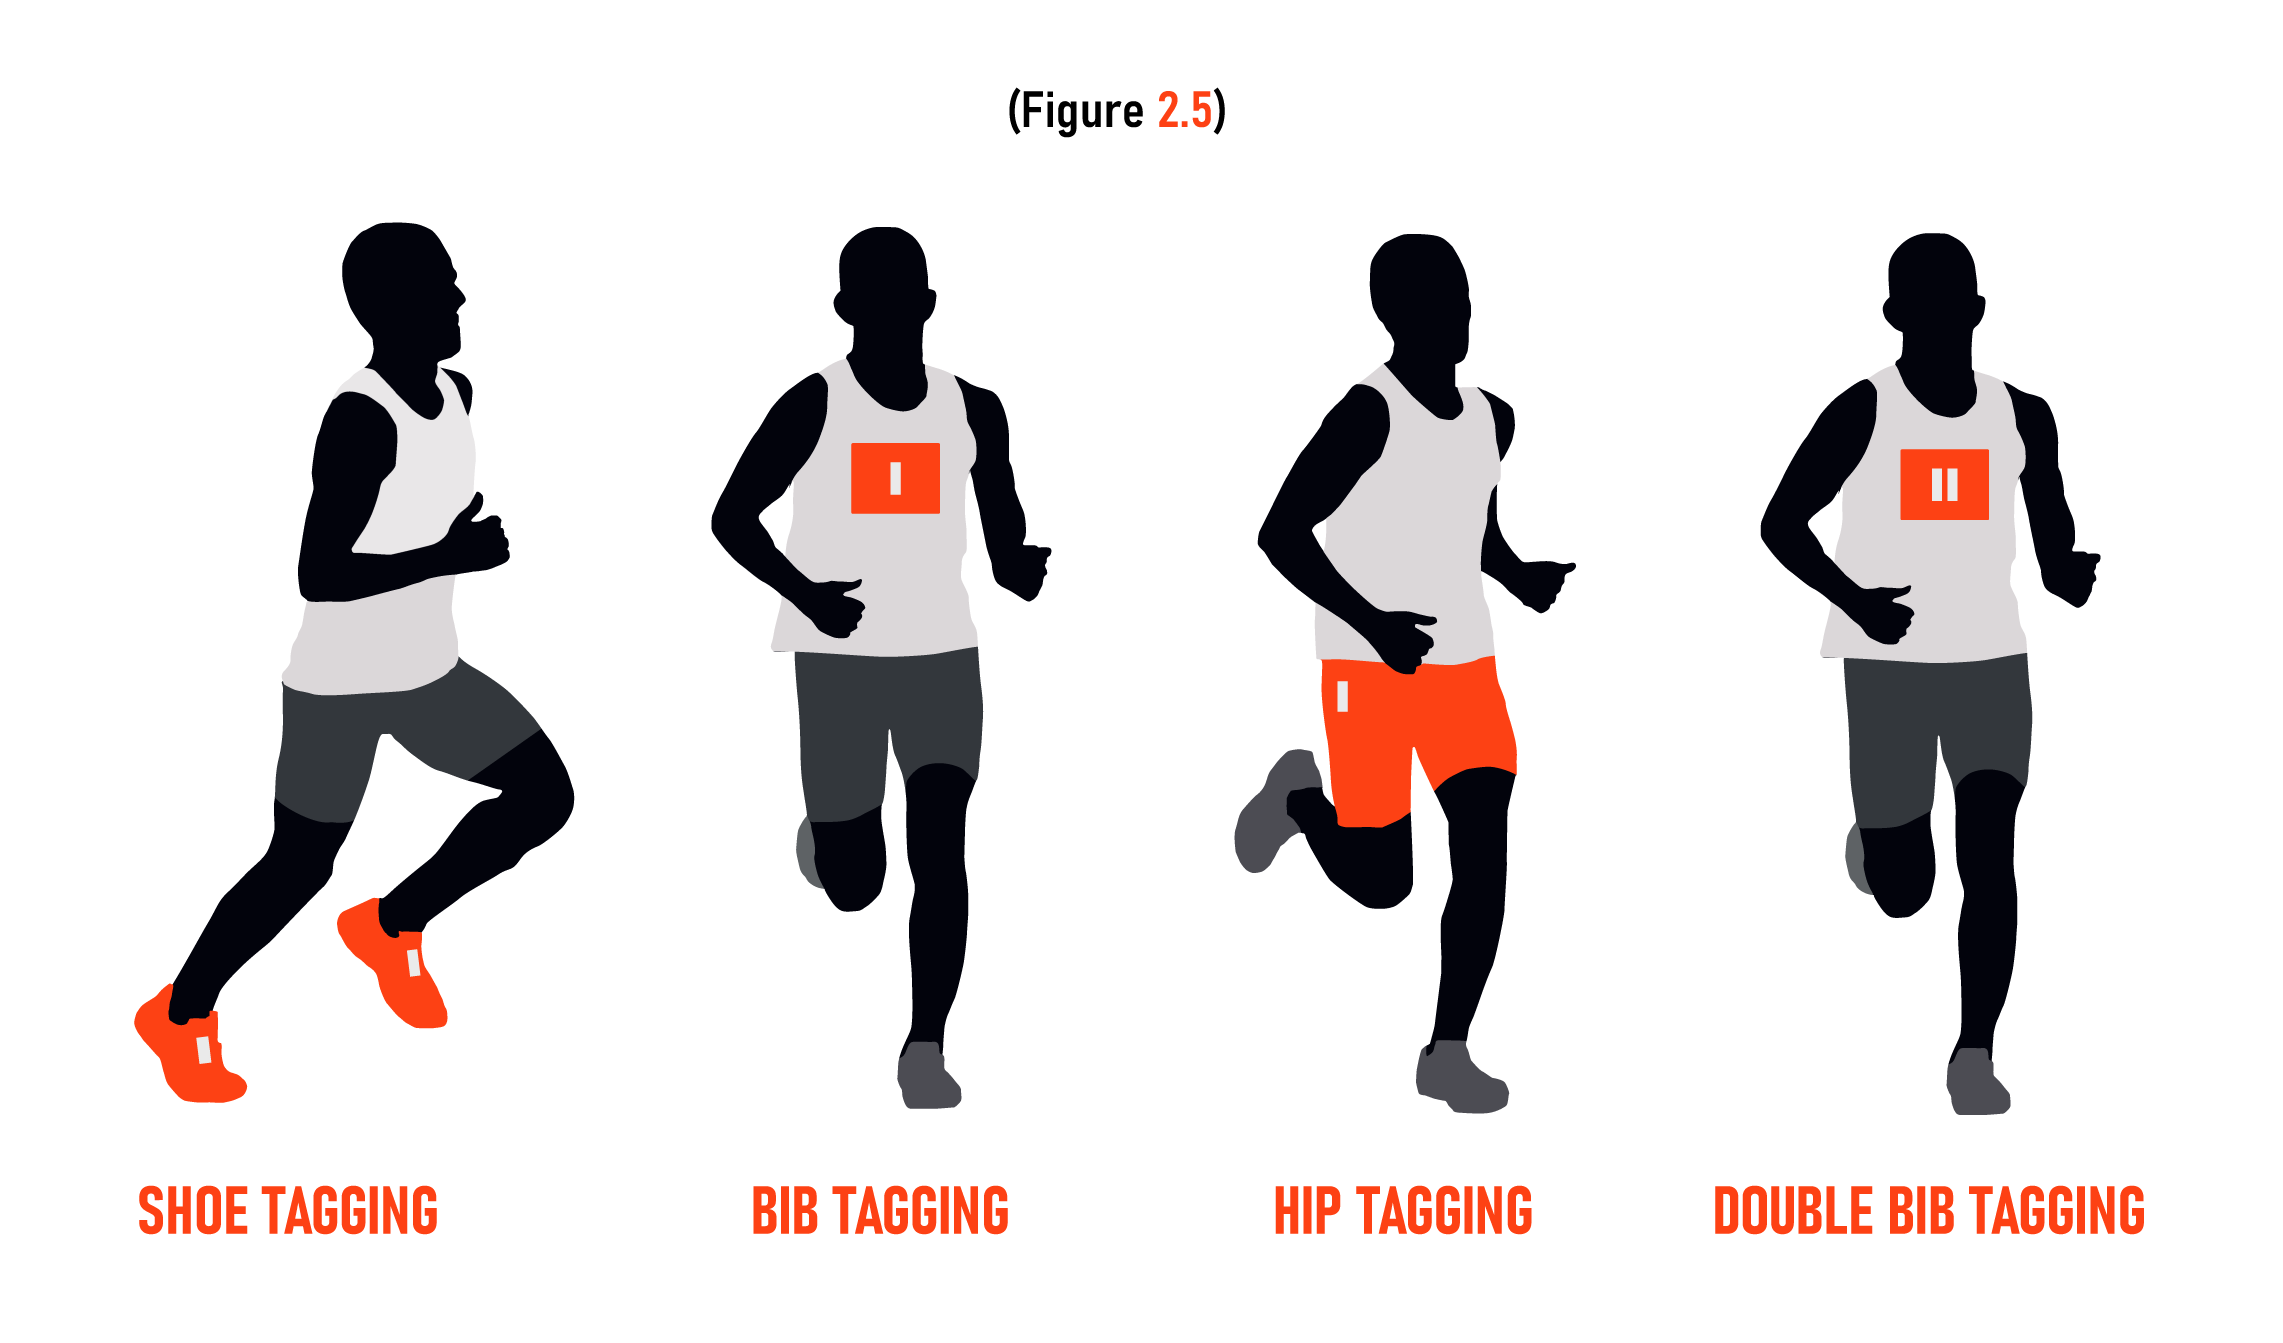
When you have encoded your tags, the next step is to determine where you will place them on the participants. While bib tagging is the most common method, there are a few other ways that are gaining momentum in the race timing industry. Deciding how you want to tag depends on your setup, your tags, and the type of race.
Below is some information about each tagging method and for more information, read Part 2 in our RFID Race Timing Series.
Shoe Tagging
Placing the RFID tag on the participant’s shoe reduces your RFID equipment setup options. A truss setup could not be used with this method because of the large space between the tag and RFID antenna. Typically, shoe tags are laminated with an extra inch or two of lamination at the top. With that extra space, you punch a hole and then slide the participant’s shoe lace through. Of note, this method is better suited for smaller races.
Bib Tagging
With this method, you simply adhere the tag onto the participant’s bib. A small strip of foam between the tag and the runner might increase the read range by adding a layer between the human body and the RFID tag. Depending on how you orient the tag on the bib (horizontally or vertically), you will need to make sure your antenna’s polarization corresponds if you are using linear antennas.
Hip Tagging
An RFID tag is placed on each hip of a participant, allowing circular antennas on both sides of the finish line to pick up the read. They are usually kept on the hips with the laminating method and safety pins that pin them to the participant’s shorts. This method shouldn’t be used with linear antennas.
Double Bib Tagging
Tagging each participant with two tags on their bib is a fairly common practice in the race timing industry. With two tags, there is an increased chance of getting a read. If you add foam backing between the tag and the runner, it will increase the read range. Also, placing the tags in different orientations will help receive more reads, if you are using circular antennas.
When Do I Test?
Testing is extremely important in your race preparations. At this point, you should have chosen a tag, tagging method, and equipment setup which means you now have all the key pieces needed to test. If you haven’t decided on a tagging method or setup, be sure to test different options to find the best method for your race. Testing is key throughout the pre-race planning period so that you can work out any kinks that may arise and modify your system to obtain the highest read rates and best range.
Pre-Race Conclusion
- I know the number of participants, have encoded all the tags, and associated them (if required) with the bib number in my software.
- I know how to successfully mount my equipment and have a planned race day setup.
- I have tested my tags, setup, tagging method, mounting equipment, etc.
- I have decided on a tagging method that works well with my setup.
- I know to register participants and have started the process (if necessary).
- I have purchased RFID equipment, accessories, and bibs.
- I have chosen an encoding method.
Race Day Considerations
When you have completed the pre-race section, you are ready to move on to the race day section. In the race day section, we will cover the following information:
- How to setup on race day
- Small details to remember
- On-site testing
Setting up for Race Day
Below are a few things to keep in mind on Race Day:
Power & Wi-Fi
If the race director is providing a power source, all you need to bring are the power cables for each device. If the race director is not providing a power source, make sure your generator or other power source is tested before you leave for the race location. A Wi-Fi connection may be important if your laptop requires internet connectivity. Ask the race director to setup a good Wi-Fi network and provide the password beforehand so you don’t have any problems on race day.
Cables
Depending on how many antennas you have per read point, setting up your antennas maybe complicated. Make sure that all RFID cables are plugged in and are snug. If a cable isn’t plugged in completely, you risk the reader not getting power to the antennas, thus missing all reads in that read zone. Also, be sure cables do not become tripping hazards and that they are either run through cable trays, trusses, or at least taped down.
Read Zones
When you are setting up a read zone, keep the antennas five feet or more apart from each other. Read Zone width is also a very important factor to consider when you set up. Most antenna read zones have a width of about six to eight feet; however, the antenna gain and tag read coverage ultimately determine read zone widths. If you allow the read zone to be too wide, you may miss tags that pass between antenna read zones.
Volunteers
Setting up a complex timing system is not a one-person job. The race timer or race director should recruit volunteers to help setup and monitor read zones in case something happens to the equipment.
Manual Timing System
Having a back-up manual timing system, in addition to your RFID timing system, helps to ensure that you won’t miss a participant. Problems like attaching the RFID tag incorrectly can be overcome with a manual system in place. Some RFID timing software packages include a manual timing system for ease of use.
Details
Sometimes equipment setup does not go as flawlessly as one hopes. On race day, it is good to have a few essentials in case your equipment has race day issues. A standard tool kit, duct tape, power cables, safety pins, and backup equipment are details that could possibly save your race. If you have a backup reader, antennas, tripods, etc., you will be better prepared for any accidents that may occur on race day.
Handing Out Bibs
It is beneficial to have a small table far away from your RFID equipment to hand out bibs or take last minute registration forms. If all of your participants crowd around your equipment, it could disturb your setup, especially your cables.
On-Site Testing
As the professional race timer for the event, it is your job to make sure that your equipment is running like a well-oiled machine and ready for tags to begin crossing the start line. Arriving at the location early is a great time to get all your read zones running and tested.
Race Day Conclusion
- Power and Wi-Fi are packed and/or will be located on-site.
- I have volunteers and a back-up manual timing system.
- I know when to get to the location on race day.
- I’ve determined appropriate read zone width.
- I know how to setup for race day.
- I have tested thoroughly.
Mitigating Potential Problems
Before any race, brainstorming potential risks is a good way to be prepared. If you are able to find weak spots in your system, you can plan to mitigate the risks and take steps to make sure nothing goes wrong. In the potential problems section, we will cover:
- How to prevent system failure during a power shortage
- How to avoid participants tripping on cables
- How to ensure you don’t miss a read
- How to avoid any mounting issues
How Can I Avoid Participants Tripping on my Cables?
When you are working with electrical equipment that has to be connected via cables, you run the risk of creating tripping hazards. If a volunteer or participant trips on your cables, not only could the equipment be damaged, but you could injure the participant as well. If an unseen participant trips and accidentally unplugs the cable from the antenna, that antenna could go down and miss reads the entire race. To mitigate this risk, run your cables through cable trays, over trusses, or at least thoroughly tape them down. Most cable trays interlock to provide a continuous surface.
What If I Have A Power Failure?
A common issue that race timers can have is a momentary loss in power. Whether it is a loose outlet or quick power surge, it could reset your hardware configurations and miss reads. A UPS backup, or uninterruptible power supply, can help you avoid such an issue on race day. Even a basic UPS backup would be sufficient to power your RFID readers because they do not use much power. A typical UPS battery backup costs about $40 - $100 depending on the size and battery requirements.
To keep your race timing system running longer in case of a power shortage, only plug your reader in to your UPS battery backup. If the UPS battery backup only has to power your reader, it can last hours longer than if your laptop was plugged in as well. To keep your laptop powered, always remember to charge your internal battery for race day.
Make sure that your system is prepared for a power failure by ensuring that your RFID system is configured to store reads and re-sync upon power re-connection.
What If I Have a Mounting Issue?
If you have tested thoroughly, mounting your equipment shouldn’t be a problem; however, in cases of unstable trusses or inadequate tripods, keep tools and extra equipment in case of necessary quick fixes. Zip ties, a tool box, and backup equipment should be all you need to ensure there are no mounting issues on race day.
What if my Equipment Skips a Read?
If all participants are tagged correctly and your setup has been thoroughly tested, you should have very few, if any missed reads on race day. Your manual timing system is your backup and will allow you to log a participant’s time.
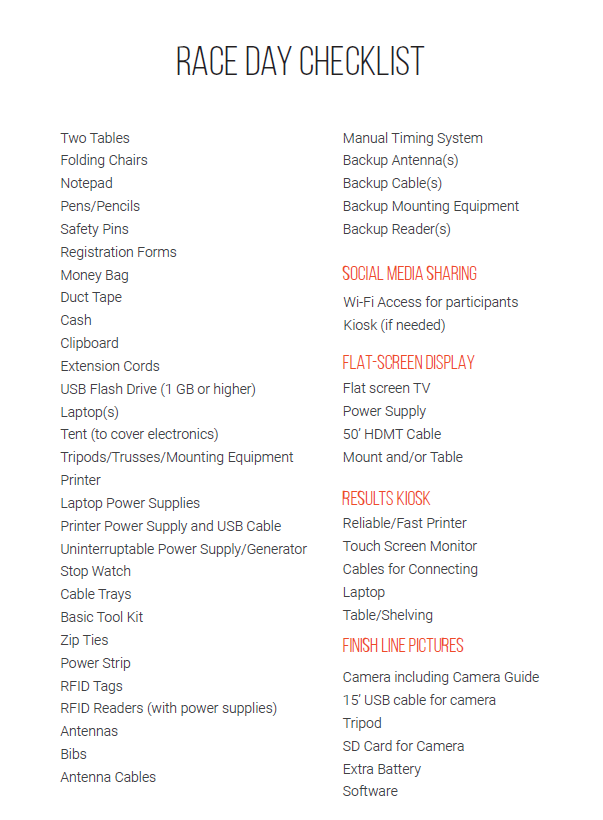
Race Day Checklist
Conclusion
RFID is one of the best ways to get accurate results in the race timing industry, and the technology is continually improving. By using this guide, you are better equipped to successfully plan, test, and implement your RFID system on race day. Please note, your system may work differently at different race locations because of environmental conditions, so be sure and test before every race. At the end of this guide, you will find a checklist of all the important items to remember on race day. It is a brief overview of the information in this guide (and more) and will be ideal for your clipboard.
For more information on all things RFID, checkout our website, our blog, our in-house ebooks, and our YouTube Channel. If you have specific questions about your Race Timing System, chat with us on our website, send us an email, or give us a call.

